Installation
The installation is done in 2 steps:
- first installing the package (preferably in a python virtual environment),
- then generating the plugin that points to the installed package, and register the plugin into Paraview. This is needed only if you want to use the Paraview plugin. Otherwise installing the package alone will let you use the utility functions.
Things to consider:
The installation procedure for the package and the plugin depend on the version of Paraview in use.
Identify your Paraview and Python installations
In case you want to use the visualization plugin and the package functions inside Paraview, you will need to identify the version of Paraview you are using. The most important aspect is to
- identify if this is a standalone version of Paraview
- if your version uses the same Python interpreter as the one of your package.
In case the installation of Paraview is standalone, Paraview may use its own Python interpreter (through
pvpython or pvbatch), while your package may be using another Python interpreter that is eg.
the one that defaults on your operating system.
Should this be the case, the interpreters in use in the plugin and the package would be different. This is usually not an issue, as the package code (as of May 2018) is pure Python and does not bring any compiled python extension. However, in case you start developing additional extensions and those contain python extensions, an ABI problem may occur and will potentially lead to a crash during the execution of the plugin.
To be safe, it is recommended to install a version of Paraview that uses the OS Python interpreter, and to use the same interpreter for installing our package.
See the Platform specific details for more information.
Package installation
The package preferably installs in a virtual environment. Also since Paraview is using Python2, we suggest
sticking to Python2. For installing the package, you need at least virtualenv and pip. Once there,
let’s first create a virtual environment like this (in a terminal):
mkdir ~/.venvs
virtualenv --system-site-packages ~/.venvs/venv_paraview_brain
. ~/.venvs/venv_paraview_brain/bin/activate
and then navigate to the path where you cloned the package, and type
cd <brain-connectivity-visualization-path>
pip install -r requirements.txt
pip install .
After the installation, you should see the package with pip list:
pip list
Package                          Version
-------------------------------- ---------
[...]
brain-connectivity-visualization 1.0
Plugin installation
For installing the plugin, we first generate a binding between Paraview and the package in the form
of an .xml file, and we then install/register this file in Paraview as a plugin.
This .xml will act as a binding between the relevant functions in our package and Paraview.
There is no streamlined procedure for installing a python plugin into Paraview, and/or to use an external python library. Paraview has different installation flavour that differ according to the platform or the way you installed the tool. We tried to make the procedure as easy as possible.
Generating the XML plugin file
Installing the package will bring you a script generate_brain_connectivity_plugin that will
be used for generating a plugin file in the .xml format. This little tool converts the
entry point of the plugin into an XML file that can be installed/registered into Paraview.
To call the tool, run the following from the command line terminal:
generate_brain_connectivity_plugin mpi_brain_plugin.xml
Registering the XML plugin file
This plugin should then be imported into Paraview
Open the menu from
Tools > Manage Plugins: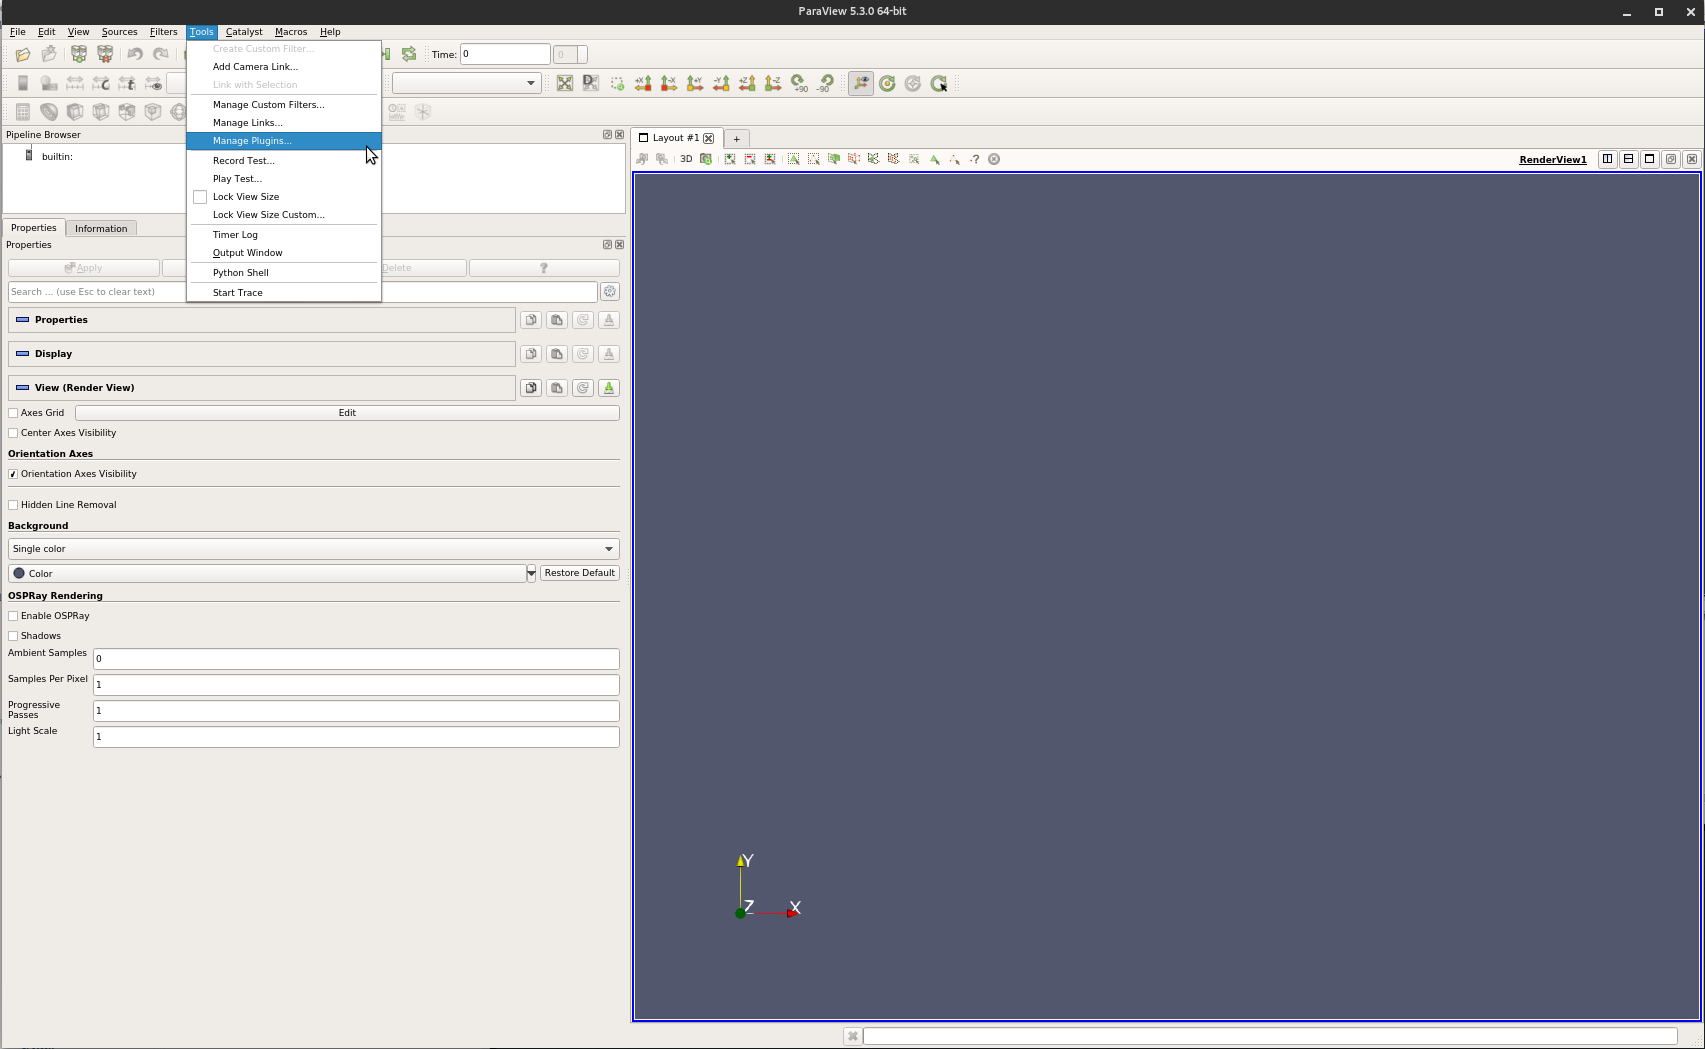
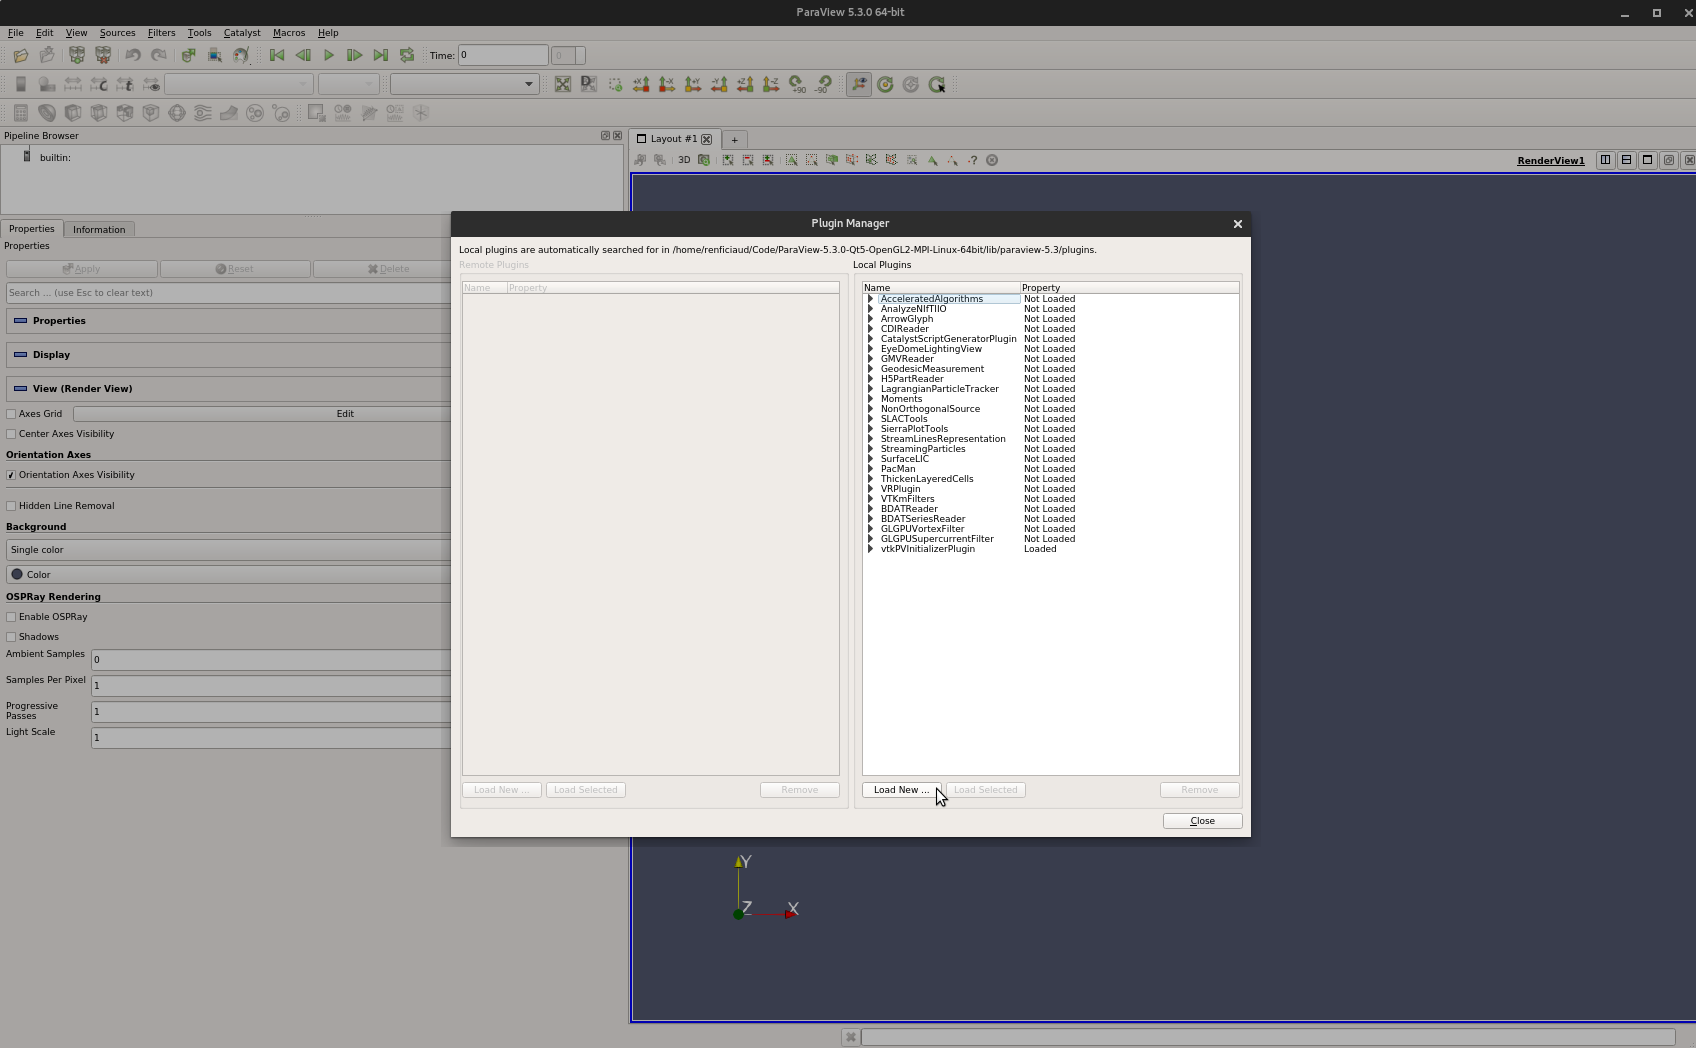
On the custom filter window, click on Load New:
Select the
.xmlfile that you generated earlier, make sure that the file filter of the selection dialog shows.xml: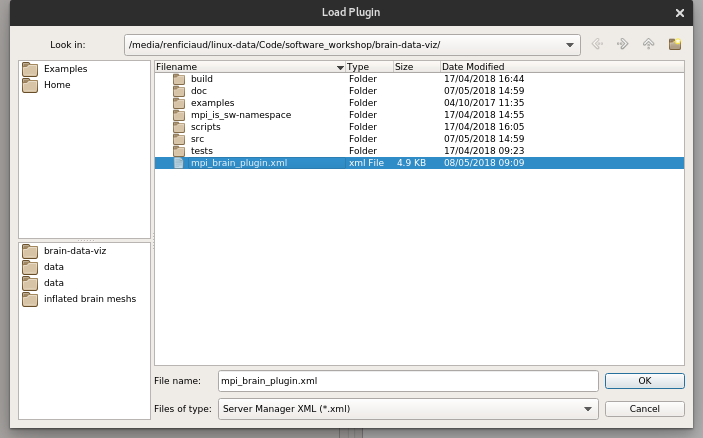
You should then see the plugin on the list of plugins, make sure the plugin is loaded. You may check the
autoloadoption for loading the plugin the next time you start Paraview.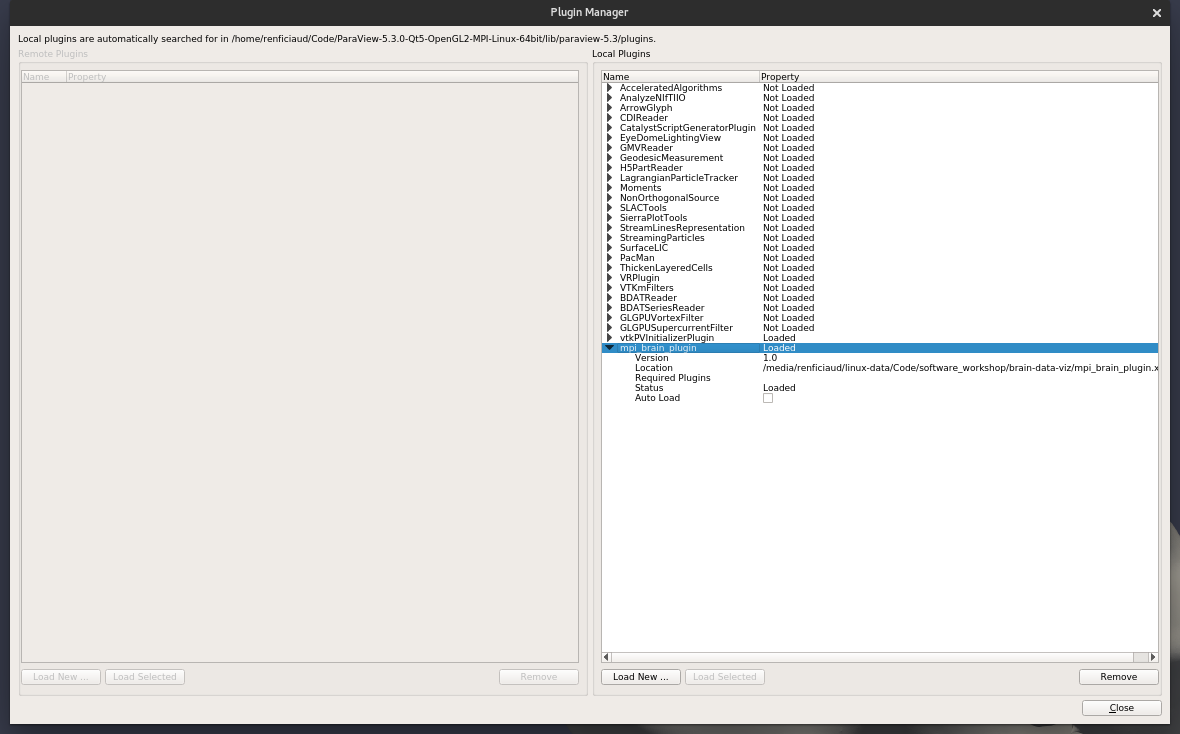
Warning
Paraview will need the .xml file you generated every time it needs to run your plugin. In case you
move this file to some other physical location on disk, you will be needing to redo the installation steps
above after having uninstalled the plugin.
Also the plugin will be using the location of the python virtual environment where the package is installed. This will let you update the package (and the plugin functionalities) without registering the plugin again, but will prevent you from removing the virtual environment.
Note
In case you save your session in Paraview for later reuse/load, the plugin needs to be loaded prior to
loading the session. This is why the autoload option is convenient.
Tip
You may have noticed the message
Local plugins are automatically searched for in <some-path> at the top of the plugin list dialog box.
If you have a standalone installation of Paraview, you may generate the .xml file directly there and
then skip the registration and loading of the plugin.
Platform specific installation details
OSX
Paraview on OSX relies on the OSX system Python (2.7.X at the current day). This means that it is possible to install the package and the plugins from a unique location using a python virtual environment, and this will be the preferred method on this platform.
Warning
If another version of Python is in use from the command line, eg. after an installation with Homebrew (either Python2 or Python3), it would mean that you may fall in the case mentioned earlier, and it would be safer to make the OSX system Python the default in that case.
The installation of Paraview is often located in /Application folder, and it is not
possible to write into the Paraview application folder. Therefor the installation
on OSX requires a virtual environment or a global installation.
Paraview comes with its own version of Numpy, that might not be ABI compatible with newer versions of the library. Numpy is extensively used in the visualization plugin, which indirectly means that the API being used in the plugin should be compatible with the version of Numpy installed along Paraview.
Some parts of the visualization plugin require VTK. It is unfortunately quite difficult to use VTK installation provided by Paraview. In particular it is not straightforward to use the libraries provided by Paraview with your own Python setup. One possibility would be
- create your virtual environment
- compile and install VTK with the python bindings
- load your python shell within your environment
- point to the freshly installed VTK
For compiling VTK:
cd <vtk-source-folder>
mkdir build
cd build
cmake -DCMAKE_INSTALL_PREFIX=~/usr/local -DVTK_WRAP_PYTHON=ON ..
make -j 4
make install
For using VTK if it is not installed in a system folder (recommanded), if for instance VTK is installed in ~/usr/local
virtualenv venv_paraview
. venv_paraview/bin/activate
pip install -r requirements.txt
pip install .
pip install ipython

# adding VTK to the list of paths of the virtualenv
USER_SITE=$(python -c "import os; print os.environ['VIRTUAL_ENV']")
echo "/Users/<myself>/usr/local/lib/python2.7/site-packages/" >> $USER_SITE/lib/python2.7/site-packages/vtk.pth

export DYLD_LIBRARY_PATH=/Users/<myself>/usr/local/lib/:$DYLD_LIBRARY_PATH
python -c "import vtk; print 'success!'"
ipython
> import vtk
For being able to run the scripts that require VTK, after installation do:
export DYLD_LIBRARY_PATH=/Users/<myself>/usr/local/lib/:$DYLD_LIBRARY_PATH
export PYTHONPATH=/Users/<myself>/usr/local/lib/python2.7/site-packages/:$PYTHONPATH

generate_brain_connectivity_volume_file id1090_timestep.nii nii-volume-2
Linux
The Linux installation is either:
- the one that comes with the operating system package manager, such as aptitude. In that case, it is likely that this installation uses the system Python and you will be using the same Python interpreter for Paraview and your package installation,
- or the one that can be downloaded from the Paraview website, that is often more recent, but that also may use an embedded/shipped Python interpreter that will differ from the one of your operating system.
In first case, the procedure with virtual environments can be safely followed. In the second case, and if the version of Python is different than the one of the operating system, an additional step outside of the virtual environment should be taken:
Suppose the standalone version of Paraview is located
$PARAVIEW_PATH, and the visualization package has been cloned to<brain-connectivity-visualization-path>Then install the package within the Paraview Python environment by typing the following in a terminal
cd <brain-connectivity-visualization-path>
$PARAVIEW_PATH/bin/pvpython setup.py install
The previous commands will install the package inside the Python installation shipped with Paraview. In this case the virtual environment installation is not necessary, as Paraview will be using only the package installed in its own environment. In all cases, the registration of the plugin remains the same.
you may need the virtual environment installation described above only if you need to perform some processing using the utility functions from a regular command line. The package will then have two installation location: the Paraview Python environement and your virtual environment.